Usage support
 4. B-QUBE
4.2 How to use B-QUBE
4.2.1 Accessing B-QUBE from Moodle
(1) Log in to Moodle and enter the course.
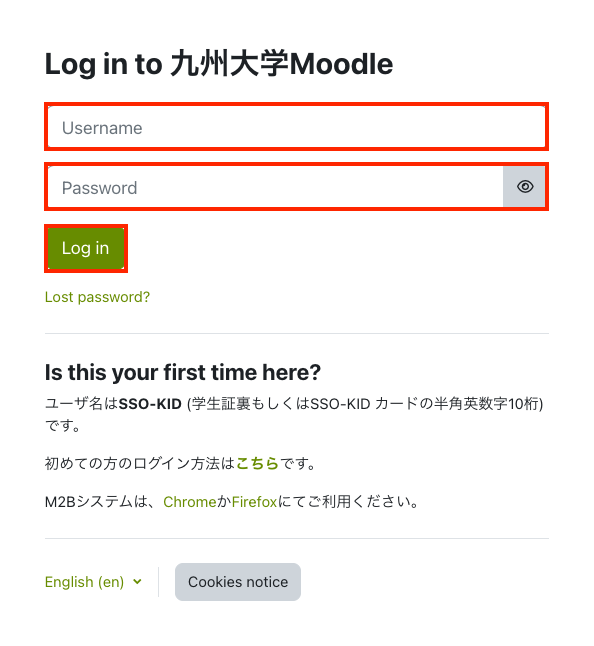
(2) Click the “B-QUBE” icon.

| Access to B-QUBE The university-wide service of the digital teaching material distribution system B-QUBE was terminated at the end of March 2026. If an instructor asks you to use B-QUBE after April 2026, please access B-QUBE in accordance with the instructor’s instructions. |
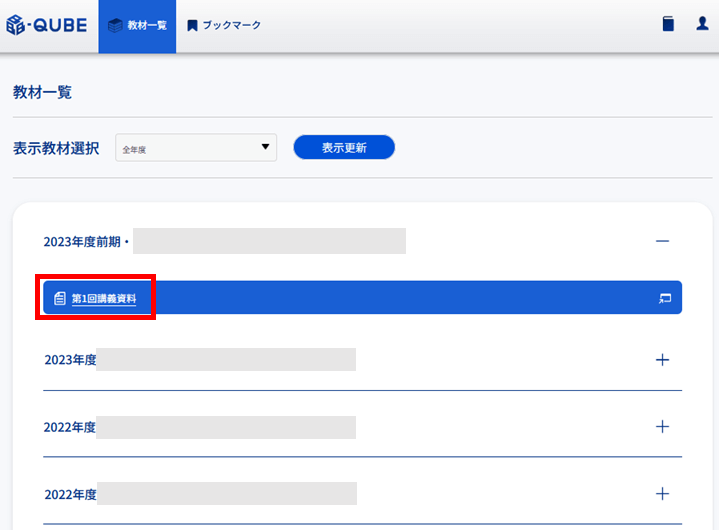
(3) On the “B-QUBE” page, click the learning material you wish to view.
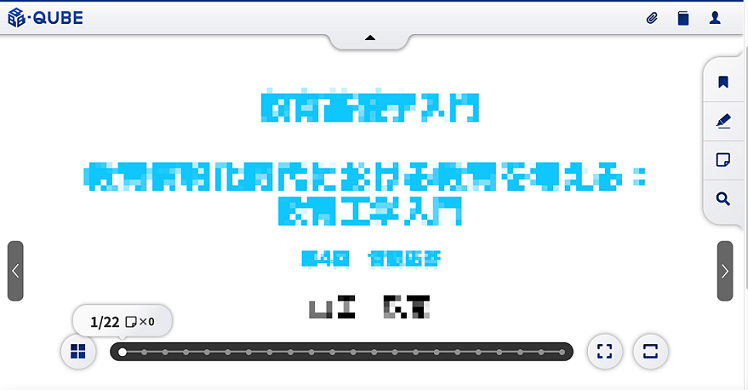
(4) The page of the learning materials viewer is displayed like this.
4.2.2 B-QUBE viewer
The “B-QUBE” viewer allows teachers and students to browse uploaded learning materials.
The following functions are supported:
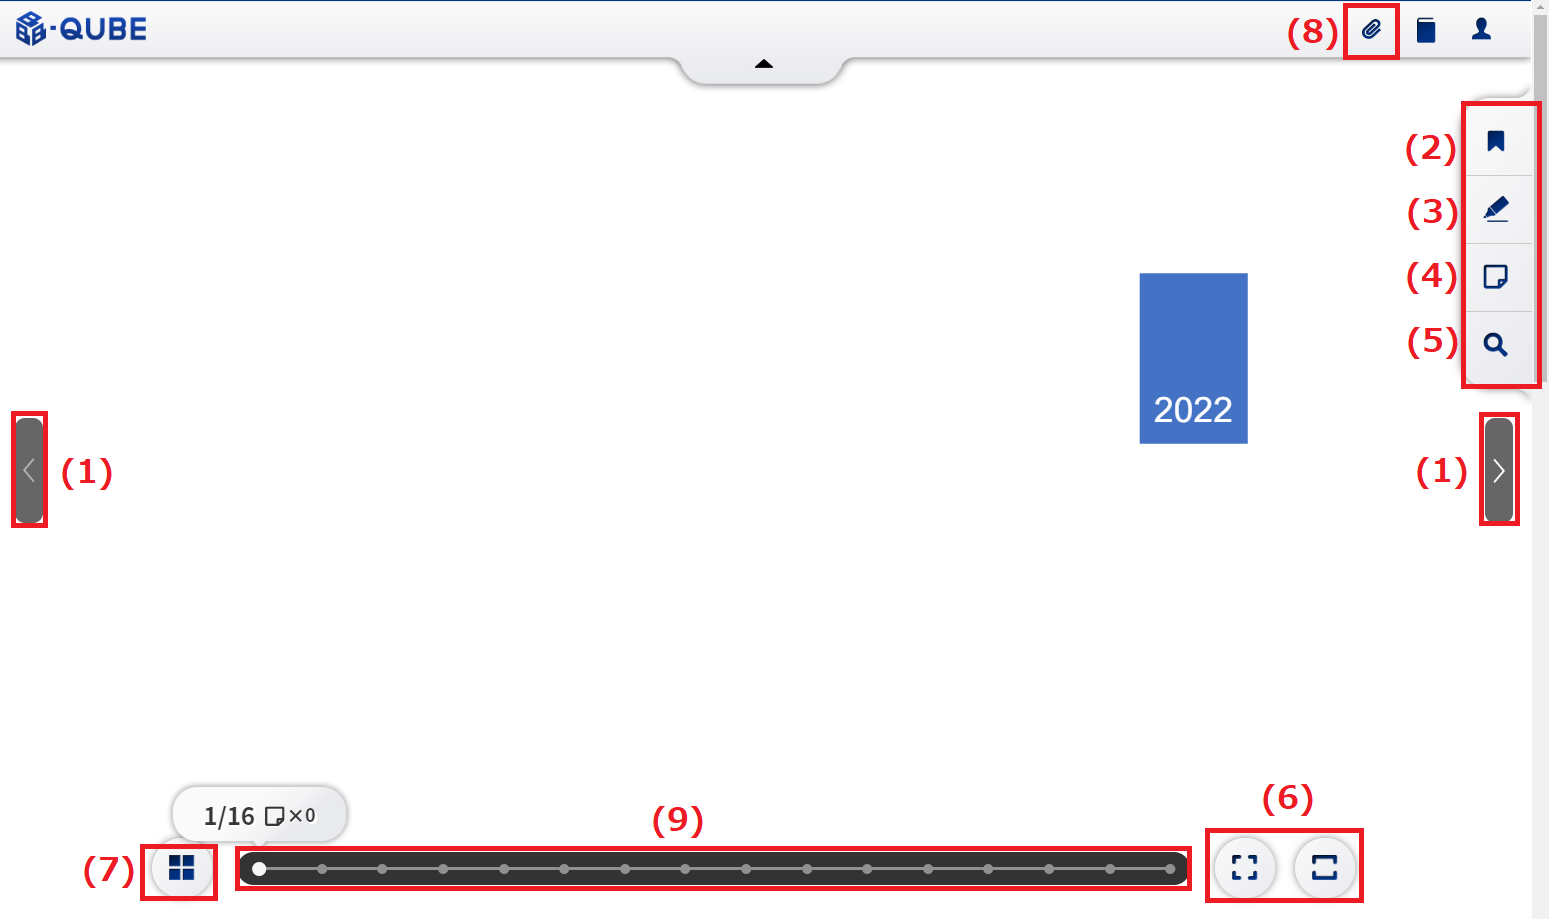
*If the functions (6) through (9) are hidden, click ▼ or ▲ at the top and bottom of the center of the screen.
(1) Page change function: Go to the next page and back to the previous page
(2) Bookmark function
(3) Highlighting function
(4) Memo function
(5) Keyword retrieval function
(6) Display functions: full-screen and full-page display
(7) Page thumbnail function
(8) Recommendation function
(9) Page navigation bar
(1) Page change function: Go to the next page and back to the previous page.

●Click the left arrow “<” to return to the previous page of the slide.
●Click the right arrow “>” to return to the next page of the slide.
(2) Bookmark function
【Adding bookmarks】
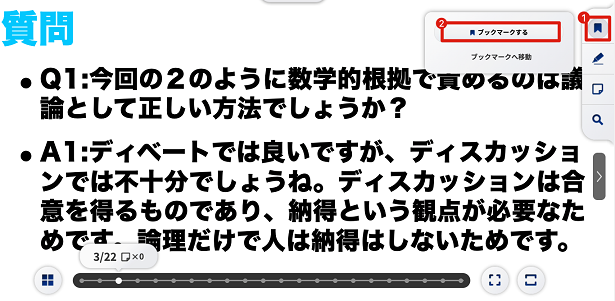
1. Click the “Bookmark” icon and the bookmark window will appear.
2. Click the “ブックマークする/Bookmark” button to bookmark the page.
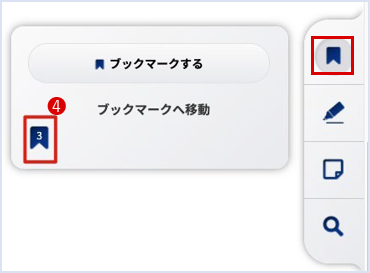
3. In the navigation bar of the page, the bookmarked page will appear like this. Click on a bookmarked page to go to the bookmarked page.

4. Click the Bookmark button and the bookmarked page number will be displayed in the Bookmarks window. Clicking on a bookmarked page number will direct the user to that page.
【Deleting bookmarks】
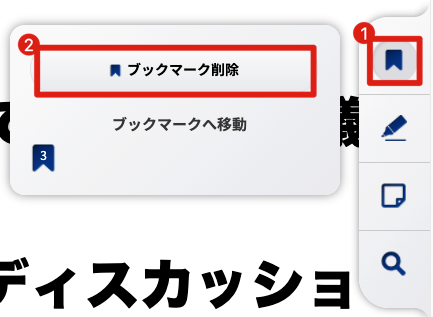
1. Click the Bookmark button and the Bookmark window will appear.
2. Click the “ブックマーク削除/Delete bookmark” button of the Bookmarks window, and the bookmark for this page will be deleted.
(3) Highlighting function
【Adding highlight】
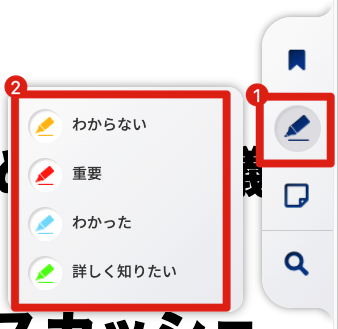
1. Click the “Highlight” icon and the highlight window will appear.
2. In the “Highlight” window, there are four types of highlights: “わからない/Don’t understand”, “重要/Important”, “わかった/Understood” and “詳しく知りたい/Want to know more”. Different highlights can be used depending on the purpose of the highlight.
Choose a marker, select a range of text, and click to highlight the slide content.
3. The highlighted content of the slides looks like this.
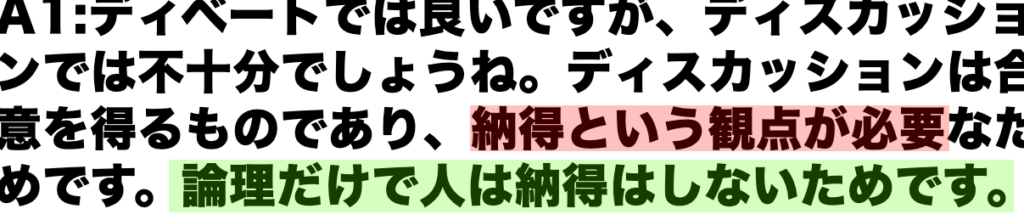 The highlighted area can be scaled in all directions.
【Deleting highlight】
1. Click the highlighted content and the “Trash” icon will appear in the upper right corner of the content.
2. And click the “Trash” icon to delete this highlight.

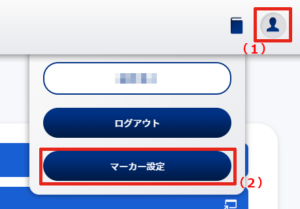
【Change highlight color】
1. Click the human-shaped icon(1) in the upper right corner of the screen and select “マーカー設定(2)/Marker Settings”.
2. Click on “色変更(1)/Color Change” to select the color of each item. Click the “保存(2)/Save” button to change the color.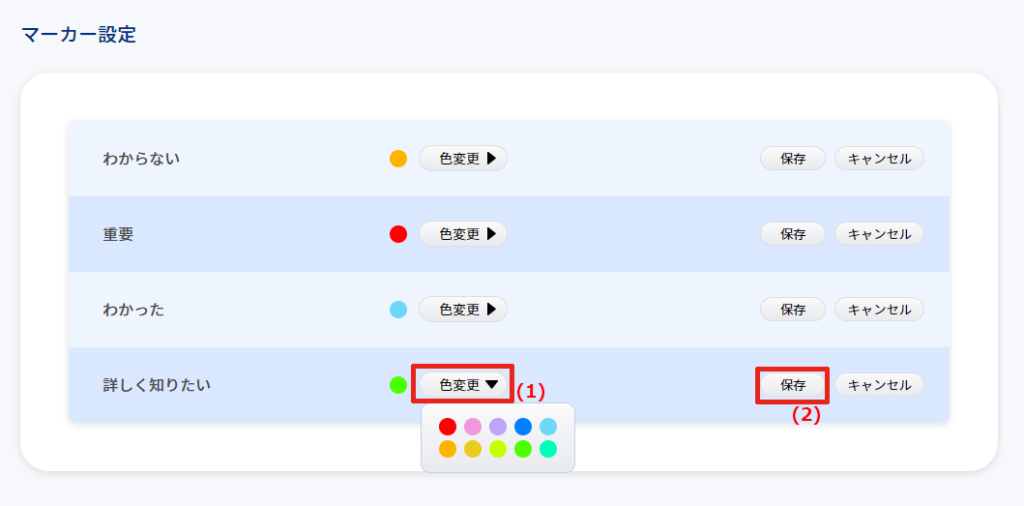
(4) Memo function
【Adding memo】
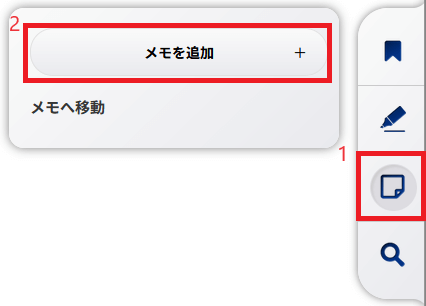
1. Click the “Memo” icon and the “Memo” window will appear.
2. In the “Memo” window, click the “メモを追加/Add Memo” button to make a memo about the content of the slide.
3. Click the slide page on the place where the user wants to memo, the “Memo” icon will be added to that place, and the “メモを追加/Add Memo” will appear.
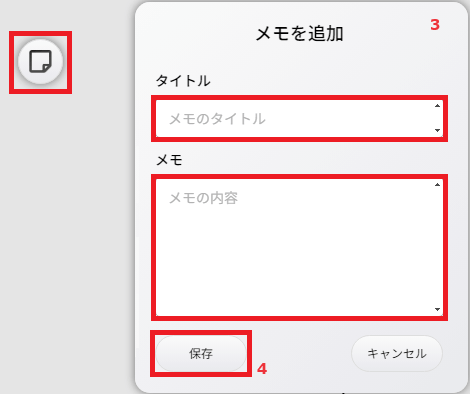
4. In the window, the user can edit the title and content of the memo. Click the “保存/Save” button to save the content entered.
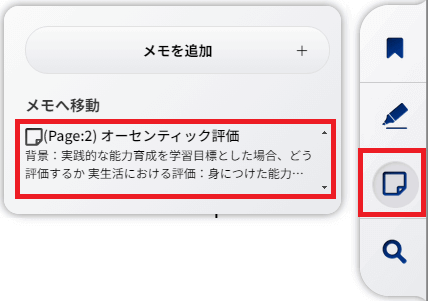
5. Click the “Memo” icon to display the list of added memos.
Then, click a memo from the list, the slide will move to this memo page, and the memo will be displayed.
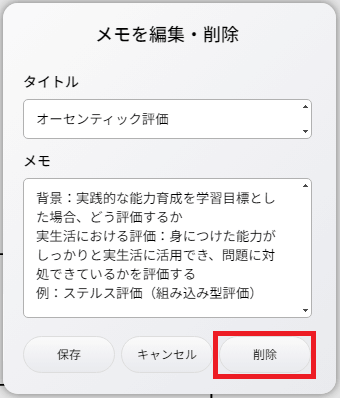
【Editing / Deleting memo】
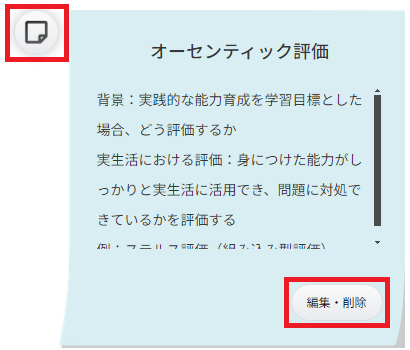
Click the “Memo” icon to display the list of added memos.
You can edit or delete the title or the content of the memo by clicking the “編集・削除/Edit/Delete”
1. When editing, modify the memo and click the “保存/Save” button.
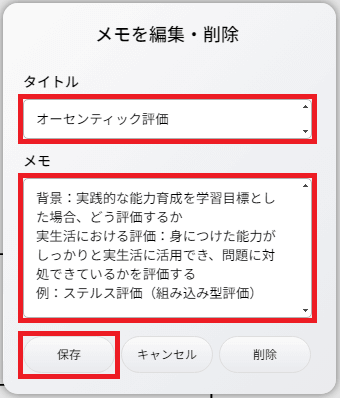
2. To delete a memo, click the “削除/Delete” button.
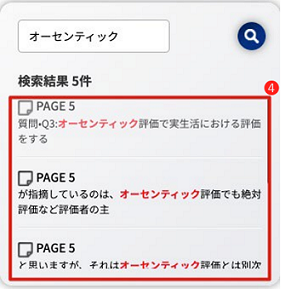
(5) Keyword retrieval function
1. Click the “Retrieval” icon and the retrieval window will appear.
2. In the window, enter retrieval keywords.
3. Click the retrieval button to search for keywords on all pages of this slide.

4. Retrieval results will be displayed at the bottom of the window. Clicking on a result will move to the corresponding page.
(6) Display functions: full screen and Display to fit window size
【 Full-screen display】
1. Click the “Full Screen” icon and the slides will be displayed in full screen.
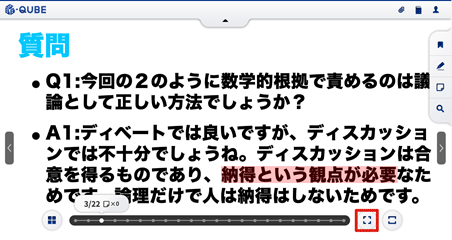
2. The full-screen view is shown below. Clicking on the icon in the original location will return you to the beginning screen view.
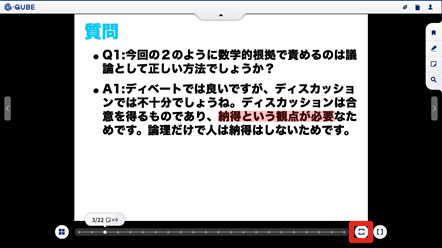
【Display to fit window size】
1. Click the “Fit to Window Size” icon to make the slides fit the window.
2. It can be displayed to fit the window width or to fit the window height.

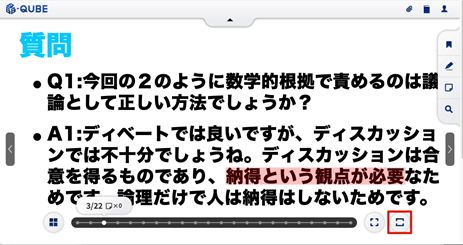
(7) Page thumbnail function
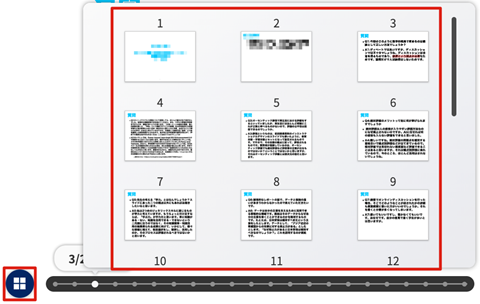
1. Click on the “View thumbnails” icon to view the thumbnail of each page.
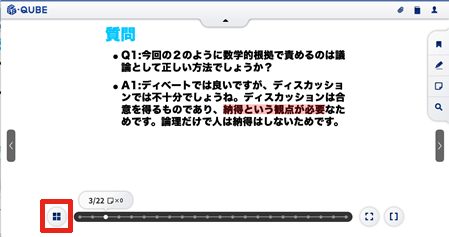
2. Clicking on a thumbnail will take you to the corresponding page. Click the thumbnail viewing button in the lower left corner again to return to the original screen.
(8) Recommendation function
1. Click the “Recommendation ” icon and it will show the recommendations added by the teacher.
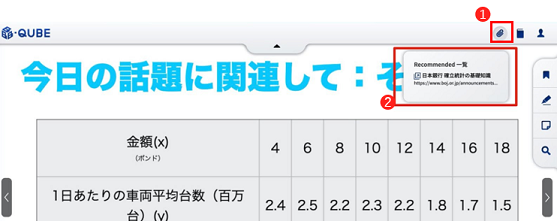
2. click the recommendation information and it will jump to the link page.