Usage support
 2. Moodle
2.3 Attendance and Absence
2.3.1 How to register your attendance
This section will describe how to register your attendance in class using Moodle.
There are three methods for registering attendance: manual, automatic, and semi-automatic.
Attendance-taking procedures vary depending on the method chosen, so please check with your instructor beforehand.
| Attendance and dishonesty
Credits may be withheld from students who are caught falsely registering their presence in class. Dishonest behavior such as falsely logging into the course is prohibited. |
◆Manual
The instructor confirms student attendance directly in the class.
◆Automatic
Attendance is counted by accessing the class Moodle course during class hours. You do not need to register your attendance.
If the course was open before the class start time, be sure to re-access the course after the class start time.
🔸Click on any of the activities or files in the course during class time.
🔸During class hours, click on “Course” under the course name.
🔸Reload the course page during class time.
How to update
Press “Ctrl + F5” – windows Press “CMD+R” or “SHIFT+CMD+R” – mac
| Important notes *If you are accessing the course before the class starts time or accessing the detail page of the “Auto Attendance Block”, you will not be in attendance. *You will be “Late” after the late time. *If you are in a face-to-face class on campus, please make sure to connect to the Edunet (campus LAN) before accessing the course in Moodle. |
◆Semi-Automatic
By submitting keywords, attendance is registered. Follow the procedure below.
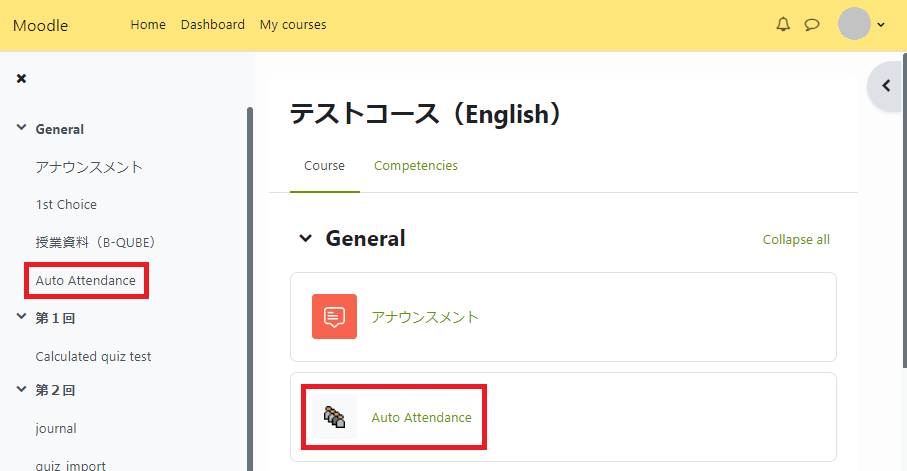
1. On the course page, click on the “Attendance” icon or link. The words displayed on the link change according to the course.
2. After obtaining the keyword from the instructor, enter it, and click the “Submit” button. (If no keyword field appears, a keyword is not required.)

3. After the message “Attendance has been successfully taken,” the screen switches to the attendance sheet screen.
Check that you are marked “P” in the attendance field, and click “Return”. The screen will return to the course page.

Attendance Confirmation Alert (use of the function is optional for faculty)
If a faculty member sets an “Attendance Confirmation Alert”, a message will be displayed on the course page to prompt students who have not yet confirmed their attendance by the specified time after the class begins. (The Moodle course page must remain open in your web browser.)
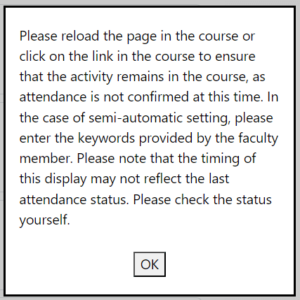
When the message appears, click [OK] and carefully read and respond to the above instructions on “How to register your attendance” (in the case of ◆Automatic and ◆Semi Auto).
2.3.2 Checking Attendance
1. Press block drawer” on the right side of the course screen to see the attendance status in the “Auto Attendance Block”. To view attendance for each class session, click on the “In detail…” link.

2. Your attendance list will appear. After checking your attendance status, click the “Return“ button to return to the course.
*Accessing the “In detail…” page of the “Auto Attendance Block” or reloading the page do not constitute attendance.
| How to check an official absence in the case of Auto Attendance Block.
You can check if an official absence is listed in the “Remarks” section of the attendance list page. The “Remarks” section displays the information entered by the instructor. Students are required to apply for an official absence separately at the student affairs section. |
2.3.3 (※ TA only) Correcting attendance status
1. Open the block drawer in the course and click on “Report” from the “Auto Attendance Block” section.

2. Click on the class date for which you want to check attendance.

3. (1) Select a class.(Only when the classification is set in the course)
(2) Confirm or enter/modify attendance.
(3) Attendance status can be changed at once.

4.Finally, click “OK” to finish.
*If you use this system to take attendance, please use this system to make corrections as well.
*Please check your attendance sheet before the end of class. Students can also check their own attendance status through the automatic attendance block. Please have students check their attendance status as well.
| What about authorized absences?
A faculty member with the Teacher role can manually change the attendance status to Attendance and enter “Public Absence” in the Remarks field to treat it as attendance. ・Regardless of the “Attendance Confirmation Method,” you can manually change the “Attendance Confirmation Method” for the relevant class. |